Choosing between LG Gram and ASUS ZenBook UX310

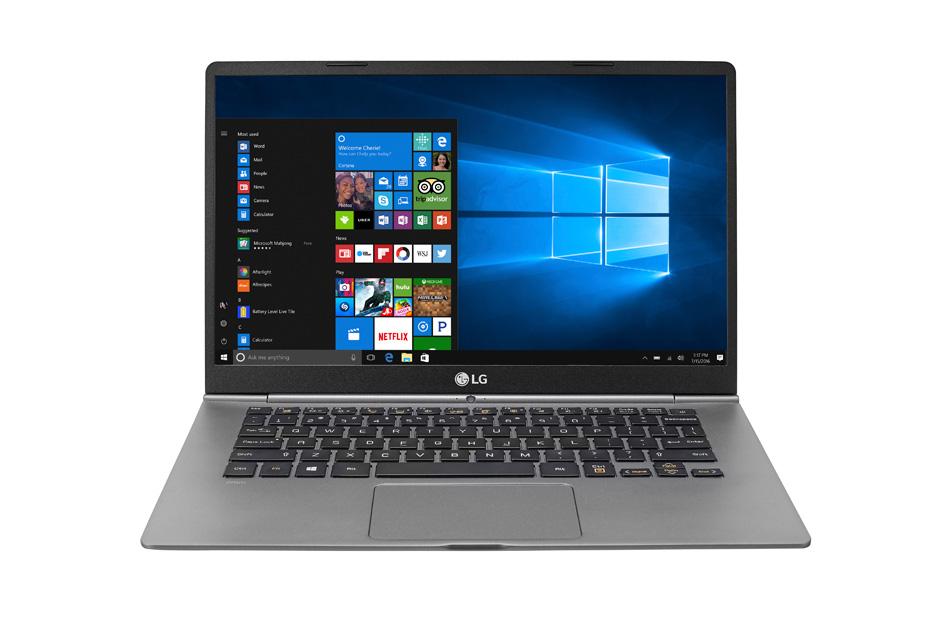
The decision was tough. The LG Gram was light AF. The screen was 14 inch with a very thin bezel. The display was amazingly bright. It had the WOW factor. You would immediately fall in love with it.
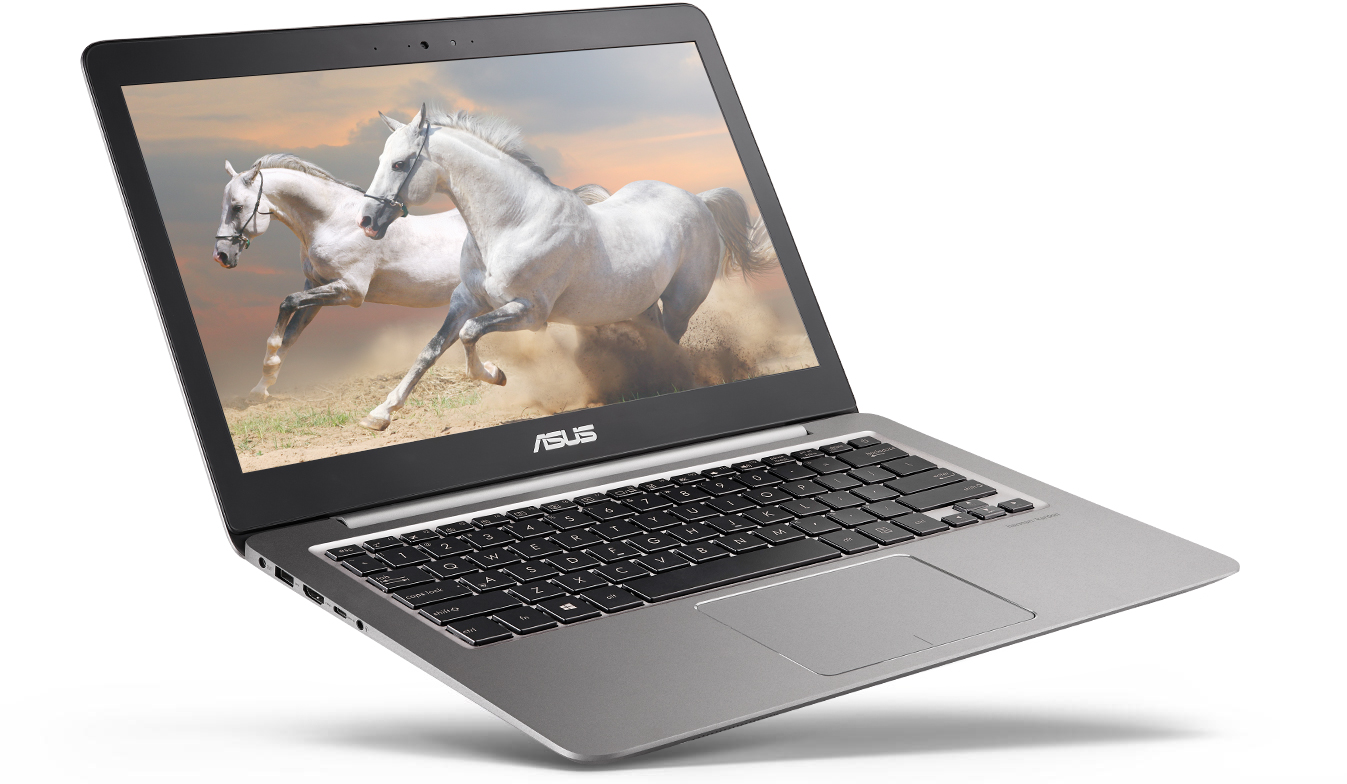
The ASUS on the other hand had a 13 inch display with a thick screen bezel. The screen looks cheap when compared to the Gram despite being 1080p. ASUS didn’t market the battery life of the ZenBook as LG did with a “17.5 hours battery life” sticker. Reading reviews online for the ASUS gave mixed results. But they claimed around 6 – 7 hours.
 

The LG Gram seems to be a much better contender but when I actually compared the spec sheets of both, the decision became harder.

The ASUS ZenBook UX310 had a 7th generation Core i7 CPU with a dedicated GPU (NVIDIA GeForce 940 MX) and 128GB SSD plus a 1TB HDD. The LG Gram had a Core i5 CPU with no dedicated GPU and a 256GB SSD. Both had 8GB RAM.

The ASUS ZenBook can easily become my main laptop while being light enough to be carried to conferences and attend on-site client meetings. On the other hand, the LG Gram has to be supplemented more storage and I might need to use a more powerful computer for editing pictures and videos. I preferred not to take the risk of buying something that might not be as fast I as I expected so I chose the ASUS ZenBok UX310 to be on the safe side.

Plus the webcam position on the Gram is really awkward for video conferencing.

Upgrading from MySQL to MariaDB on Ubuntu Server 16.04LTS

Let’s see which version of MySQL is installed

root@mysql-bak:~# dpkg -l | grep mysql
ii  mysql-client-5.7                 5.7.22-0ubuntu0.16.04.1  
ii  mysql-client-core-5.7            5.7.22-0ubuntu0.16.04.1  
ii  mysql-common                     5.7.22-0ubuntu0.16.04.1
ii  mysql-server                     5.7.22-0ubuntu0.16.04.1 
ii  mysql-server-5.7                 5.7.22-0ubuntu0.16.04.1  
ii  mysql-server-core-5.7            5.7.22-0ubuntu0.16.04.1

Rumour says that MariaDB is a “drop-in” replacement for MySQL. Let’s try install MariaDB as is.

reimport them hereroot@mysql-bak:~# apt-get install mariadb-server
Reading package lists... Done
Building dependency tree       
Reading state information... Done
The following package was automatically installed and is no longer required:
  libevent-core-2.0-5
Use 'apt autoremove' to remove it.
The following additional packages will be installed:
  libdbd-mysql-perl libdbi-perl libmysqlclient20 libterm-readkey-perl mariadb-client-10.0 mariadb-client-core-10.0 mariadb-common mariadb-server-10.0 mariadb-server-core-10.0
Suggested packages:
  libclone-perl libmldbm-perl libnet-daemon-perl libsql-statement-reimport them hereperl mailx mariadb-test tinyca
The following packages will be REMOVED:
  mysql-client-5.7 mysql-client-core-5.7 mysql-server mysql-server-5.7 mysql-server-core-5.7
The following NEW packages will be installed:
  libdbd-mysql-perl libdbi-perl libmysqlclient20 libterm-readkey-perl mariadb-client-10.0 mariadb-client-core-10.0 mariadb-common mariadb-server mariadb-server-10.0 mariadb-server-core-10.0
0 upgraded, 10 newly installed, 5 to remove and 0 not upgraded.
Need to get 16.3 MB of archives.
After this operation, 15.2 MB disk space will be freed.
Do you want to continue? [Y/n]

And we press Y!

The old data directory will be saved at new location. │ │ A file named /var/lib/mysql/debian-*.flag exists on this system. The number indicated │ │ Therefore the previous data directory will be renamed to /var/lib/mysql-* and a new d │ │ Please manually export/import your data (e.g. with mysqldump) if needed.

And all your data is not accessible.

You’ll need to have MariaDB 10.1 or higher which can import MySQL data.

sudo apt-get install software-properties-common
sudo apt-key adv --recv-keys --keyserver hkp://keyserver.ubuntu.com:80 0xF1656F24C74CD1D8
sudo add-apt-repository 'deb [arch=amd64,i386,ppc64el] http://mariadb.mirrors.ovh.net/MariaDB/repo/10.2/ubuntu xenial main'
sudo apt update
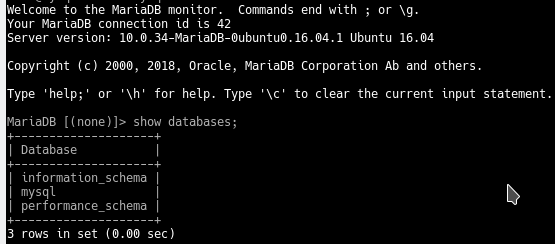
sudo apt install mariadb-server

You database should now be MariaDB 😉

How to check your MyT internet usage #Mauritius

Mauritius’s biggest Internet Service Provider still caps internet for poor people to 1Mbps after having exceeded a quota. Here’s how to know how much internet you got left

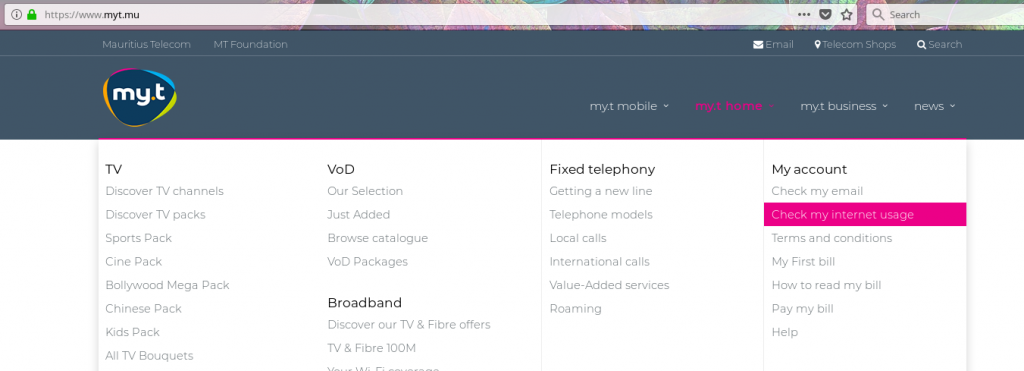
1. Go to myt.mu > my.t home > Check My Account

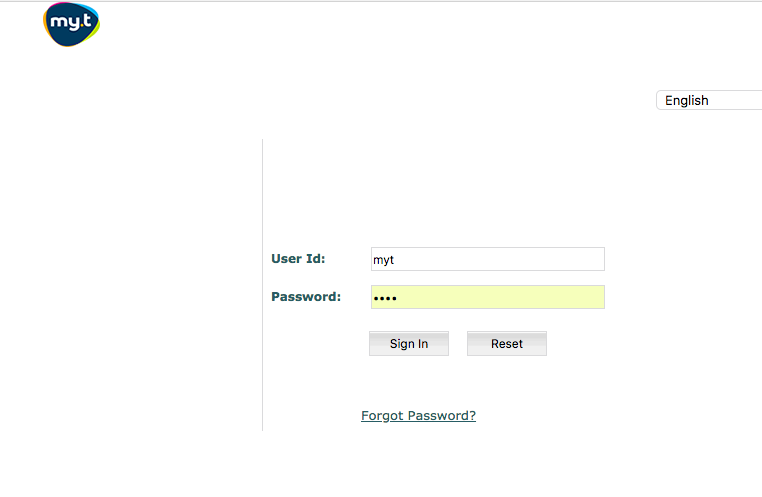
You’ll get a page like this:

2. Call 8900 from your mobile phone and ask them for the password.

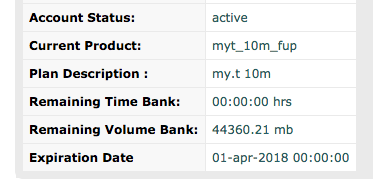
3. Once logged in, you shall see how much data allowance you got left:


Duplicate Monit IDs in MMonit

when you’re using MMonit software with multiple VMs cloned from a template with monit installed, there are sometimes 2 VM get the same monit IDs. You’ll notice that there are errors on your MMonit dashboard which disappears after a while.

To view the monit id of your VMs, type the following command on your terminal

# monit -i

What do you do if you have hundreds or thousands of VMs? How will you know which ones have duplicate IDs?

I implemented a solution using SQL Triggers.

CREATE TABLE `duplicate_monitids` (
`ipaddrin` varchar(255) NOT NULL DEFAULT ”,
`monitid` varchar(255) DEFAULT NULL,
PRIMARY KEY (`ipaddrin`)
)

delimiter //
CREATE TRIGGER duplicate_monitids AFTER UPDATE
ON host
FOR EACH ROW
BEGIN
INSERT INTO duplicate_monitids(ipaddrin,monitid) VALUES(NEW.ipaddrin,NEW.monitid);
END//
delimiter ;

Then to view the VMs which have duplicate IDs, run the following SQL Query

select ipaddrin from duplicate_monitids where monitid IN (select monitid from duplicate_monitids group by monitid having count(*) > 1);

Playing with Microsoft’s Sharepoint REST API

I couldn’t get Sharepoint to be loaded as an External Storage in Nextcloud. I had find a way to use the old school `curl` to debug the problem.

To properly authenticate, you will have to add some extra parameters to curl

$ curl –ntlm –negotiate -u <Domain>/<Username>:<Password> “http://<url>/<site>/_api/Web/getfolderbyserverrelativeurl(‘%2F<site>/<Folder>’)?$select=Length,TimeLastModified” -v

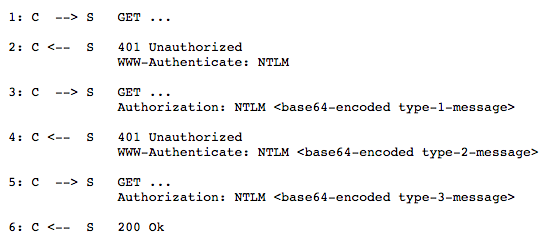
Notice the `–ntlm –negotiate`. These parameters enable “NTLM Authentication Scheme for HTTP” rather that the usual HTTP Basic Auth. This in turns make lots of back and forth between the curl and MS Sharepoint.

The logs of my HAProxy looks like this. We can see that the curl request has made 3 HTTP requests.

web sharepoint/sharepoint 0/0/1/8/9 401 503 - - ---- 2/2/0/1/0 0/0 "GET /my/_api/Web/getfolderbyserverrelativeurl('%2Fmy/MeraDocs')?=Length,TimeLastModified HTTP/1.1"
web sharepoint/sharepoint 0/0/0/8/8 401 830 - - ---- 2/2/0/1/0 0/0 "GET /my/_api/Web/getfolderbyserverrelativeurl('%2Fmy/MeraDocs')?=Length,TimeLastModified HTTP/1.1"
web sharepoint/sharepoint 0/0/0/15/18 200 3314 - - ---- 2/2/0/1/0 0/0 "GET /my/_api/Web/getfolderbyserverrelativeurl('%2Fmy/MeraDocs')?=Length,TimeLastModified HTTP/1.1"

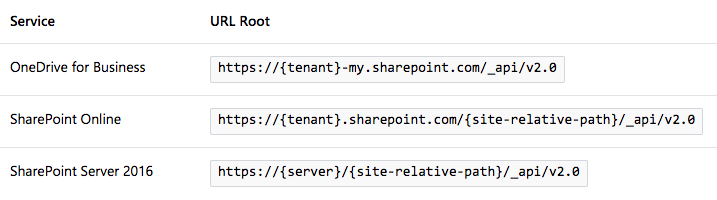
However I was getting a 404 response in the third response initially. Turns out the API endpoints are different for OneDrive, SharePoint Online and SharePoint Server 2016:

Since I was using SharePoint Server locally, I chose the 2nd endpoint and it worked perfect.

[1] http://www.commandlinefu.com/commands/view/7005/get-a-file-from-sharepoint-with-curl

[2] https://stackoverflow.com/questions/15697157/using-curl-with-ntlm-auth-to-make-a-post-is-failing

[3] https://docs.microsoft.com/en-us/onedrive/developer/rest-api/getting-started/sharepoint-server-2016